Sharing Shabby Chic #4 Class Photos


Last night I taught the monthly Shabby Chic card class using the gorgeous 49th & Market papers. (Link to class sample posting)  So, today I am sharing with you some of the class photos I took of the ladies working on their cards. Everyone was almost finished their first card before I remembered to take some photos...

The first card...


...and the second card.


The ladies used stencils and paste for the first time and are excited to do it again in the future. We had a blast working on the cards, and look forward to the next Shabby Chic class in July.

Thank you for stopping by to share in our class fun. Happy creating everyone!


Christmas In July - Shabby Chic Style


Hope you are having a good day everyone!

It's hard to believe that 2017 is nearly half way gone! And with July around the corner, it means..., July 22nd, at the Langford Legion Hall, there will be three different classes for Christmas in July! And this is the class I will be teaching.


Christmas in July has always been a looked forward to event in the world of papercrafting. And it's here again! For this class we will be going Shabby Chic with BoBunny's Winter Wishes 6 x 6 paper pad creating 5-1/2 inch square cards. It's always a good idea to have a variety of styles in your Christmas card stash so that you can give something that you know will fit the person you ...are sending your greetings to. Among the techniques and product used we will be using corrugated silver glitter paper, creating a wreath with heavy twine, using silver doilies, splattering with white paint and Wink of Stella.

There will be plenty of paper left over in your pad to create a lot more Christmas cards in any style you like, or make copies of what we create in class!

Bring to Class: Paper trimmer, scissors, old toothbrush, margarine or yogurt lid, paint brush, Clear Wink of Stella, gesso, non-stick craft mat, heat tool, wipes, Distress Inks - Worn Lipstick, Gathered Twigs, and ink blending tool, paper distresser, double sided adhesive tape, liquid glue, mini-glue dots, white 3D foam squares or tape, & Platinum Pearl Liquid Pearls.

When: Saturday, July 22nd
Time: 9:30 am to 12:30 pm
Where: Langford Legion Hall
Cost: $30 + GST

Below are the three cards shown individually with an additional close up.


This class was posted just a couple of days ago, and is beginning to fill up! So if you love Shabby Chic or have family and friends that appreciate this style, reserve your spot ASAP with Stacey at sbebc2011@gmail.com.

Thank you for stopping by to have a look. Happy card making!


HFC Flip Fold Album Meets G45 Nature's Sketchbook


Hello everyone!

Today I am sharing with you a series of five classes to complete a large project that takes time to put together. We are taking the Heartfelt Creations Flip Fold Album and six packs of their inserts along with Graphic 45's "Nature's Sketchbook" paper collection to create a beautiful interactive album.


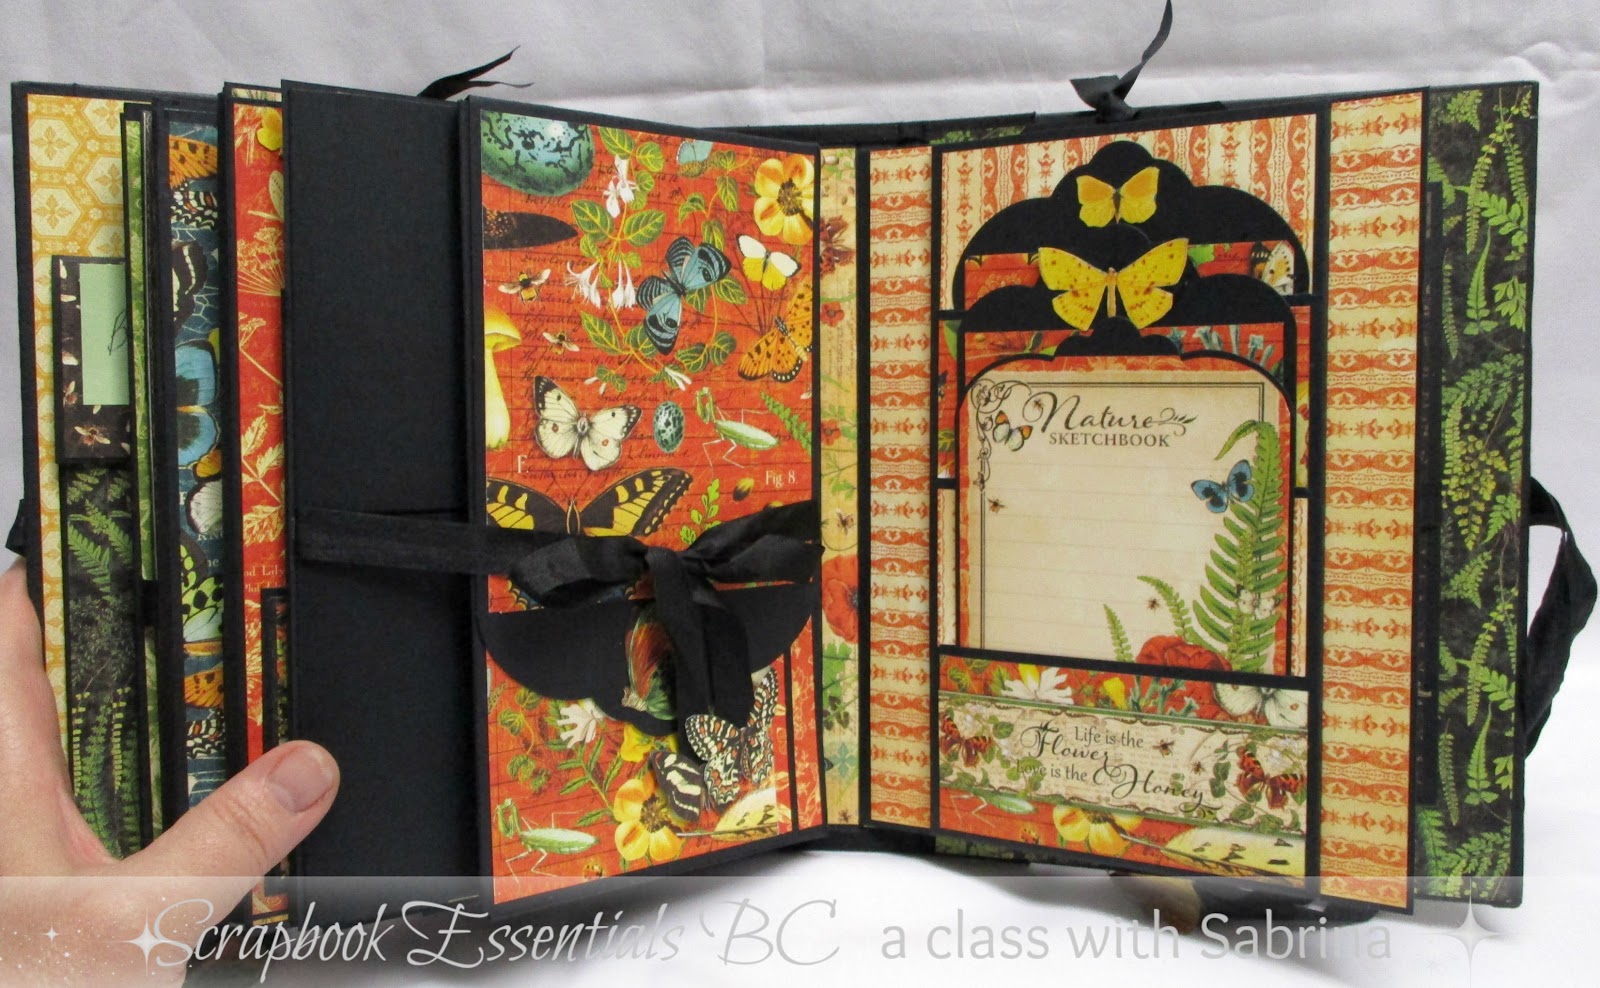
This 3 1/2" thick album is filled with interactive pages using the HFC insert kits. The wonderful thing about these inserts is that they can be folded, combined and inserted, in many different ways! And the gorgeous Graphic 45's Nature's Sketchbook is perfect to create an album for any theme.

1 SPOT LEFT!

The classes will ALL be held on Tuesday Evenings from 6 pm to 9 pm at SBEBC's Studio!
June 27th
July 4th...
July 25th
Aug 1st
Aug 8th


Cost for entire 5 series class: $195 + GST (includes over $100 in product!)...that's like only paying $19 per class!


BRING TO CLASS
For the first 4 classes:
Paper trimmer, scissors, black or gray marker (to run along paper edge to hide white paper core), ruler, pencil, scissors, craft knife/exactor knife, Cutting mat, bone folder, liquid glue, double sided adhesive (recommending score tape for this project), small post-it-notes, and a little notebook.

For the fifth/final class: bring in addition to the above Homework given at class 4 (fussy cut butterflies), black 3D foam tape or Squares, and a Xyron Sticker Maker if you have one.

I took over 50 photographs of this project, and obviously I can't post them all, but I am including the pages below and leaving out the photos that show the details and interactive parts. Once I get my iPad working properly, I will add a video of the entire project and the interactive details.

So grab your favorite beverage, or a chocolate bar, and enjoy the following pics.


It is a lot of fun to add the very last thing, before photos that is, to this album. All the fussy cut butterflies! A person could always add them after the photos are put in if you wish. I loved the idea of gluing two mirror imaged butterflies together at the end of each ribbon. That will help to keep the ribbon from fraying with use.

(spot for future video)

So, thank you for joining me at a look of this fun project, and see some of you in class!

Happy creating!


49th & Market Vintage Artistry Folio


Hello everyone!

Hope that your Summer is getting off to a good start. I am sharing with a class project that is scheduled for July 8th. Scrapbook Essentials posted the class on June 12th, and a day later there is only one spot left! I am still posting this for everyone to see.

We are using file folders to create a simple folio using the gorgeous 49th & Market 'Vintage Artistry' collection and some of their incredibly beautiful flowers.

Here is the folio from the front...


...and a close up of the gorgeous flowers.


Class posting...

Create this lovely neutral file folder folio using the gorgeous "Vintage Artistry" collection from 49th & Market. We will create the folio using file folders with an elastic folio closure. The neutral colours of this folio make it ideal for any genre of photos from wedding, to births, to celebrations, vacations, friendships and more. It holds a minimum of 20 photos. More can be added on the pockets and tags. Lovely, sparkly flowers embellish the front flap of this folio. (Cardstock for photo mats if desired, is not included for the class, as everyone will have different sizes of photos. There will be coordinating cardstock available for sale if you wish.)

This is what you will need to bring class: Paper trimmer with a good blade, scissors, pencil & ruler, 12 x 12 scoreboard, bone folder, good quality double sided tape, liquid glue, paper piercer and pad, and either a gray/brown ink pad with ink blender, or a marker of same colour.

When: Saturday, July 8th
Time: 9:30 - 1:00
Cost: $40 + GST
Where: SBEBC Studio


When you open the folio, you see this.


When you take the folded tag out of the pocket on the right you then have this. I used library card pockets and cards to create these fun photo and journaling spots throughout the folio.


Next when you open the folio further on the left, you see this.


More real estate when you flip open more sections and expose more library card pockets.


When you flip open the large center flaps, you see this larger pocket and tag with more library card pockets.


It was fun to create another file folder folio after not having done so for a few years, and I look forward to teaching this class next month.

Happy creating everyone!


Spectrum Noir #5 class - Purples and Pale Hues


We had our last Beginners Spectrum Noir class on Saturday, where we introduced the Purples and Pale Hues to the beginner sets. These are the cards we worked toward accomplishing. In class there was only time to practise techniques and colouring the sample sheets. (forgot to take a photo of my practise sheet)


Here is the first image we worked on.


In this image you can see that the little blue bird was coloured twice. Once on the image, and a second bird to cut out and pop up over the first.

The second image (Penny Black) we worked on we also covered more practising of the hair and skin just as with the first card.


In the close up below, you will see that we coloured a second set of forearms with the hands holding a coffee mug, and glued it down at the elbows, while popping up behind the mug. This makes the woman seem just a little more dimensional. (don't know if you could see that in the photo above, but in real life it is more noticeable)


The photos below are of the techniques and practising in class.


The next Spectrum Noir classes will be in the Fall and will be different from this beginners' series of classes. To all those planning on continuing with Spectrum Noir colouring remember to purchase your Pastels and Lights sets, as well as complete your unfinished cards that we have worked towards over the last few months. And, HAVE FUN COLOURING OVER THE SUMMER!

Happy colouring!