Pop-Up Box Card with Graphic 45 Botanical Tea - Card Class


Hi everyone! hope you are having a good day.

A while back I mentioned that I would be teaching two classes in June, here in lovely Victoria BC. The first class being the four Graphic 45 "Couture" cards I've already posted. On that same day I will be teaching a second Card class using Graphic 45's 'Botanical Tea". Gorgeous paper! Love it. I could work with it for months!

Anyway, I'm here today to show you he cards in question. I've decided to show all four to you today, so it will be a longer post.


I'll show them to you in the order as above, from left to right.
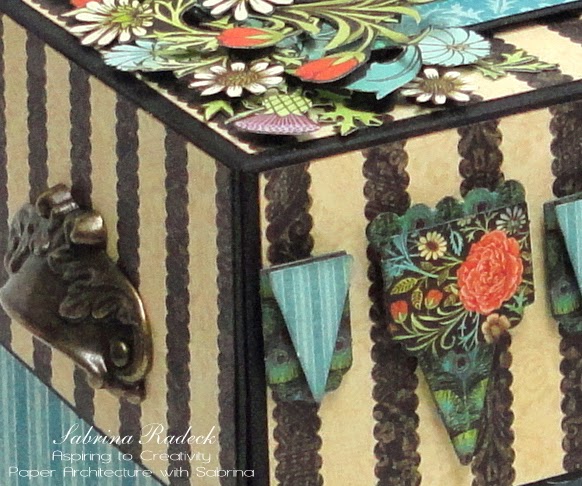
Brown & Blue

I think these colors worked very well together. The ATC from the 8 x 8 pad could have a sentiment stamped on it or left as is.


The flowers are from the Flowers set for the botanical Tea collection. I water misted them, scrunched them up, shaped them and let them dry. I decided I need to put ribbon on at an angle like this again. And for those taking taking the class here, I like to include photos from different angles.


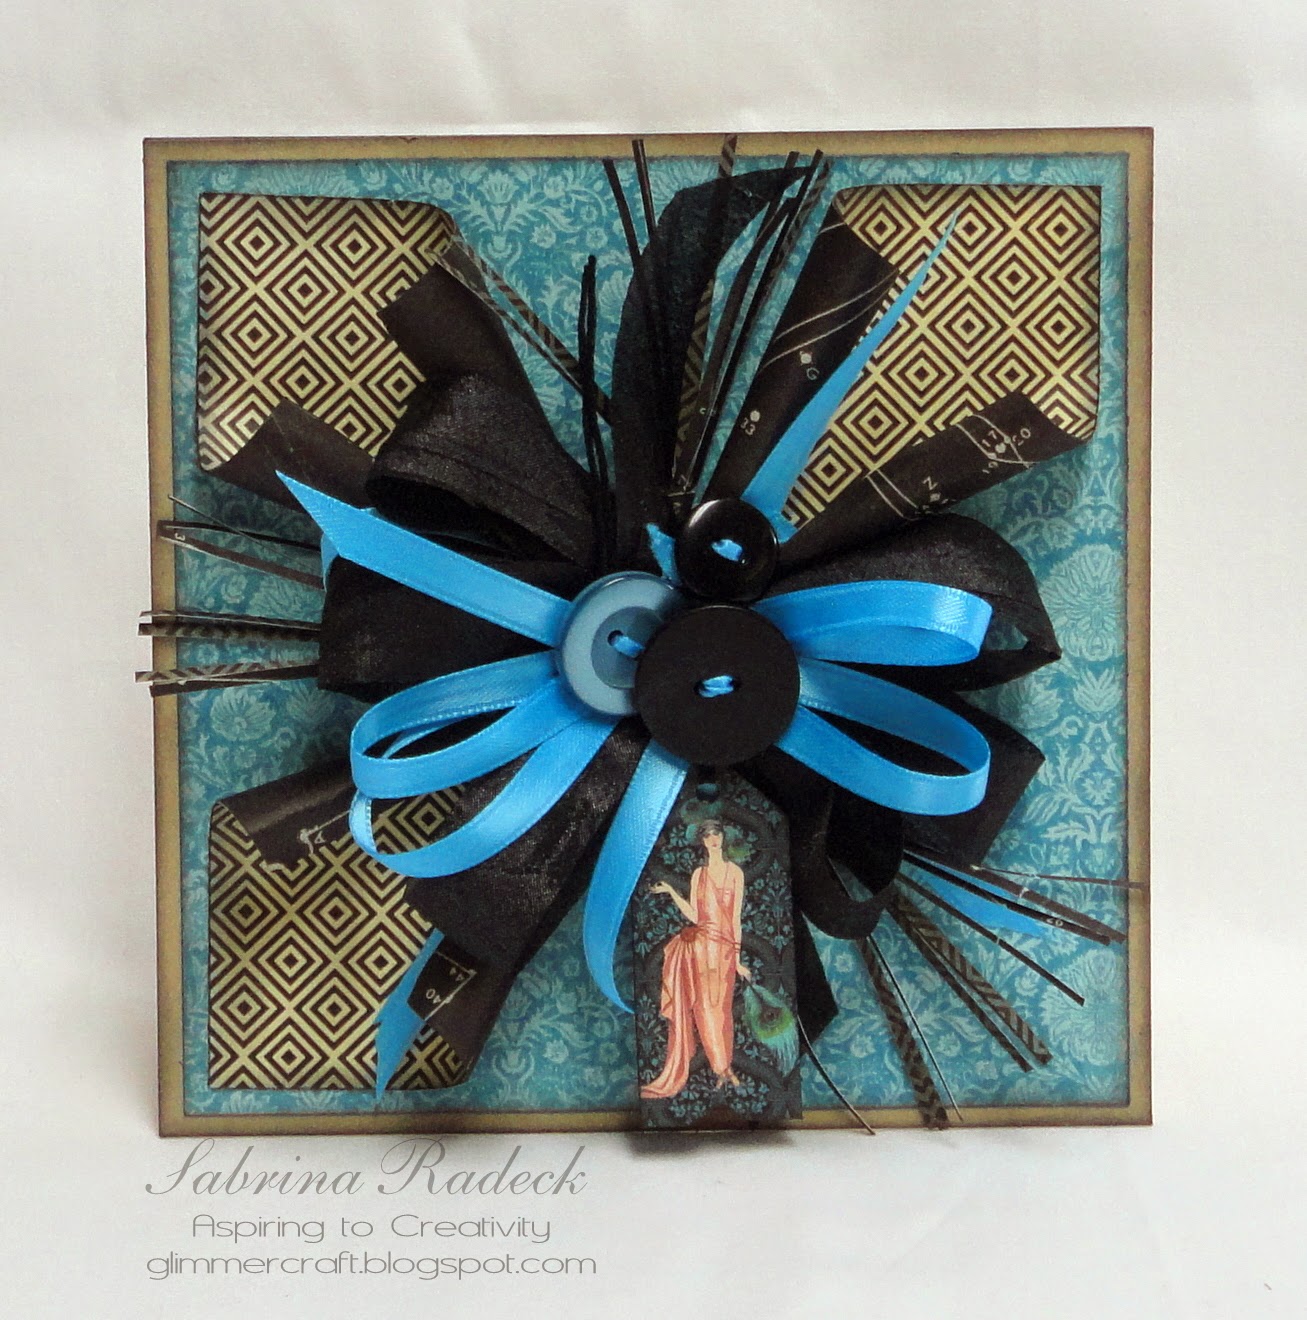
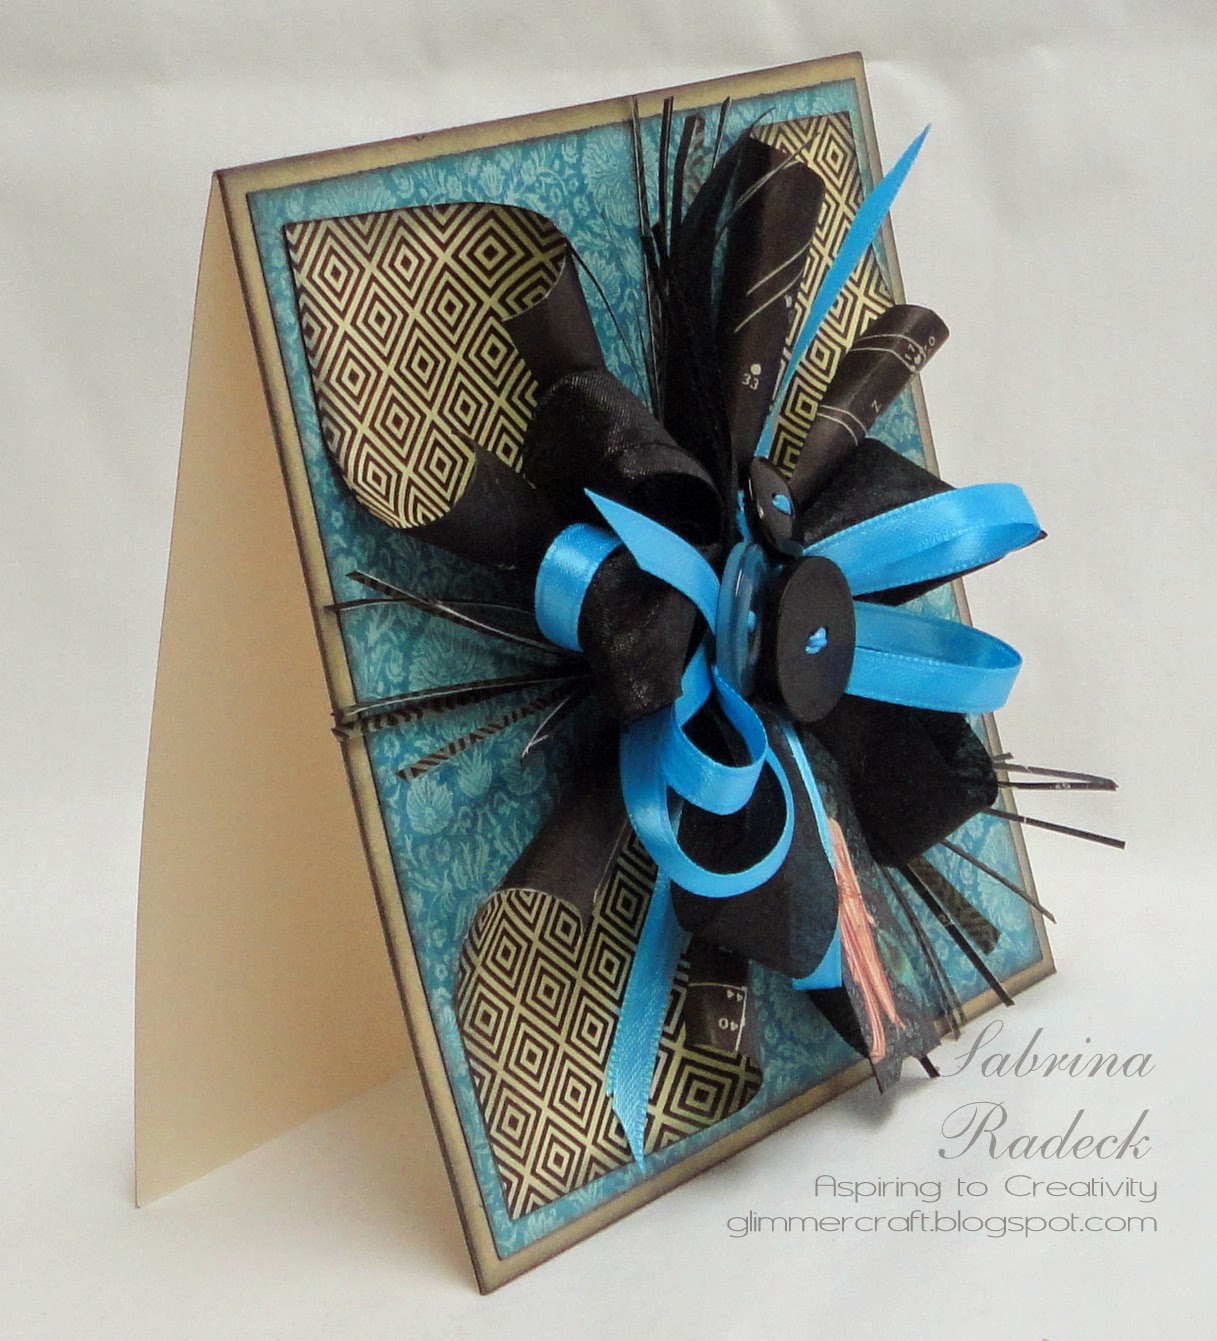
The next card I'll show you will be the Pop-Up Bo Card.


I used one of the Graphic 45 Botanical Tea stamp sets for the sentiment on this card. More angle shots.


And the back...


Close up of the fussy cut layers...


And here you see that it fits into the A7 envelope nicely. Not mailable, but fits in the envelope to hand deliver.


I normally don't make a video about a card, but in the case of this Pop Up Box card I thought it might be useful in viewing it better.


Next we see that Pink & Green & Brown card.


I created a few tags using MFT's Traditional Tags Die-Namics, punched a hole in the top and added a bit o brown ribbon. Again the stamp is from one of the Graphic 45 Botanical Tea stamp sets. The adorable flower was created using their die cut paper flower set.


And the final card of the four is a Blue & Pink card.


I used Spellbinder's Square Postage stamp die and the Large Square Nestabilities to create the frame. And of course, some fussy cutting again. I have several detail photos for those taking the class.


Well, that's it for this class. I look forward to teaching this class in June.

Thank you for stopping by today to have a look. Hope you've been inspired to play with your Graphic 45 Botanical Tea paper.

Happy Papercrafting!


Exploding Mini?

The sneak peek is now revealed! An exploding Mini-Album! I decided rather than posting all of the  many photos I have of this project, I would just feature and few and let the video show case the whole exploding mini-album. After all, a picture is worth a thousand words, right! So here we go.


So let's see the rest in the walk-through video.


Hope you enjoyed seeing this project. The instructions with video tutorial link is available on my other blog - Paper Architecture with Sabrina.

So was the sneak peek what you thought it would be?

Thank you for joining me today, and happy papercrafting!


Sneak Peek of A New Project!

Hello everyone!

I'm so excited about a project I made for Paaper Architecture with Sabrina.  So today, I thought I would give you a "Sneak Peek", and hopefully have it posted some time on Thursday/Friday. These things always take longer than I think they will, even when I allow for extra time. But once everything is ready I'll post the photos and walk-through video for you.

So here's your sneak peek.


In the meantime, I would love to read your comments on what you think the project might be. Just a bit of a hint - it's a combination of two ideas in one item.

Happy Papercrafting!


4th Card - A Class For June - Graphic 45 Couture

I'm back today with the last of the four "Couture" cards I'll be teaching in June. I'll also be teaching another card class that same day, featuring Graphic 45's "Botanical Tea" collection. So you should soon be seeing those cards as well.

So back to the fourth card. This one is my favorite of the four.


And, it has some very fine fussy cutting involved. I filled in parts of my peacock metal embellishment with three different colored "Stickles" to make it more glitzy and pop a bit more.

Here are a couple of photos from different angles.


Hope you enjoyed your tour of these four cards. Here is a photo of the four of them together.


I look forward to teaching this class!

Happy Papercrafting!


3rd Card - A Class For June - Graphic 45 Couture

Hi Everyone! I'm here again today to share with you the 3rd card of four that I'll be teaching for this class in June.

Today's card is back to the oranges of the "Couture" collection and is a square easel card.


Once again there is some fussy cutting for this card. The doily is off-set but the pocket and tag are centered. The next photo shows the card closed...


...and the next one folded up again, but from the other side.


That's it for this one, and tomorrow is the 4th and last of the class series. It also happens to be my favorite of the four.

See you tomorrow, and happy Papercrafting!


2nd Card - A Class For June - Graphic 45 Couture

Today, I'm sharing with you another of the four cards I'll be teaching in June. This one will be one of the blue cards. It's a square one and involves rolling paper, and cutting fine long strips that get rolled up to create somewhat of a feathery look.


This card definitely can't be put into a regular square card envelope. One would have to make a nice card box to go with it or include it inside a parcel being shipped off.


I was trying for a different look, one that had a bit of a modern deco look. It was fun to challenge myself to try for something different.

So that's it for the 2nd of the four cards for this "Couture" card class. Hope you are enjoying the series so far. See you tomorrow with the third card!

Happy Papercrafting!


A Class For June - Graphic 45 Couture

Hi Everyone!

In June I will be teaching a couple of card classes, and want to share with you the four cards that we'll be making in the "Couture" card class. I'm going to post one card per post over the next few days.

The paper we'll be using for this card class is Graphic 45's "Couture" - two square cards, and two A7 (5 x 7) cards. Two will be focusing on the oranges of the collection, while the other two will be featuring more the blues of the Couture line.

I'm going to begin today with one of the orange cards.


And yes, I had to fussy cut. I just love using the elements of the paper to create with. With the exception of the tiny fussy cut flowers and such, everything is edged with Tim Holtz Black Soot. The pearls add a bit of a classic touch and balance.

Here are another couple of views.


So that's it for this card. I'll show you another card tomorrow.

Till then, Happy Papercrafting!


Repurposed Box for Card Set

My Mom has a dear friend that she wanted to give a gift to for Easter. She approached me and asked if I would make some cards in a box for this friend. She requested that the box be beautiful, but simple, and that the cards would have flowers on them. The cards also had to be easily mailed, with little bulk and weight to them.

I ended up going to my personal hoarded stash for things I wanted to use for myself in the future. I was just hoarding it all, and when would I really have the chance to use them when there are always more and more gorgeous papers piling onto my hoarded pile.

I began by making 10 A7 cards. The paper I used was given to me by a friend as individual sheets pulled out of a 12 x 12 pad. So I couldn't say where the designer paper came from. But It is gorgeous paper! Since the floral pattern was quite large I had to go with making the bigger cards. I made two of each, one in a landscape format and one in a portrait format.

Here they are.


Some of the flowers, or parts of the flowers had glitter already on them, but for the ones I framed, I covered entirely with sparkle by using Star Dust Stickles on them. This would help to bring out that one flower from the others. The only exception was the hydrangeas, as they were already all covered with glitter.

I took this box that you see here below, and originally had some chocolate goodies in it from last Christmas, and recovered it and re purposed the box. Here is the box before I covered it.


And, here it is after I covered it.


Secret Garden is one of my favorite collections, and it really changed the look of the box. I next created a divider for inside the box to have a section for the cards and envelopes, and a section for writing utensils, stamp envelope and a little box for rolls of stamps, or white out, or something else.


In this next photo you can better see the stamp envelope and the little box.


More of the little box and the envelope. I thought that the box could hold a couple of stamp rolls or some 'white-out', treats for when writing those lovely long letters to go in the card, or things to include in the card, like confetti, etc.


So that's it for this project that I made for my Mom to give to her best friend.

Hope you where inspired to try re purposing a box, too.

Happy papercrafting!