File Folder Scrapping II - Instructions

Do you remember this? And this?

Well when I prepared to teach this class some time in September or October 2013 for the second design in the series, I had promised you I'd put up the second set instructions on Paper Architecture for you. I've finally had the time to do it for you! Thank you so very much for your patience.

In making the  second design for the tutorials that accompany the instructions I used different paper. Leftover Graphic 45's French Country as a matter of fact. So here it is. I'll show the photo's first, and then add the new walk-though video using this paper.


Just to refresh your memory, this is the one I taught for the class back in 2013.


Now back to the French Country version. Here is a closer look at the spine embellishments.


And the cover embellishments...


And when you open the folder you see this...


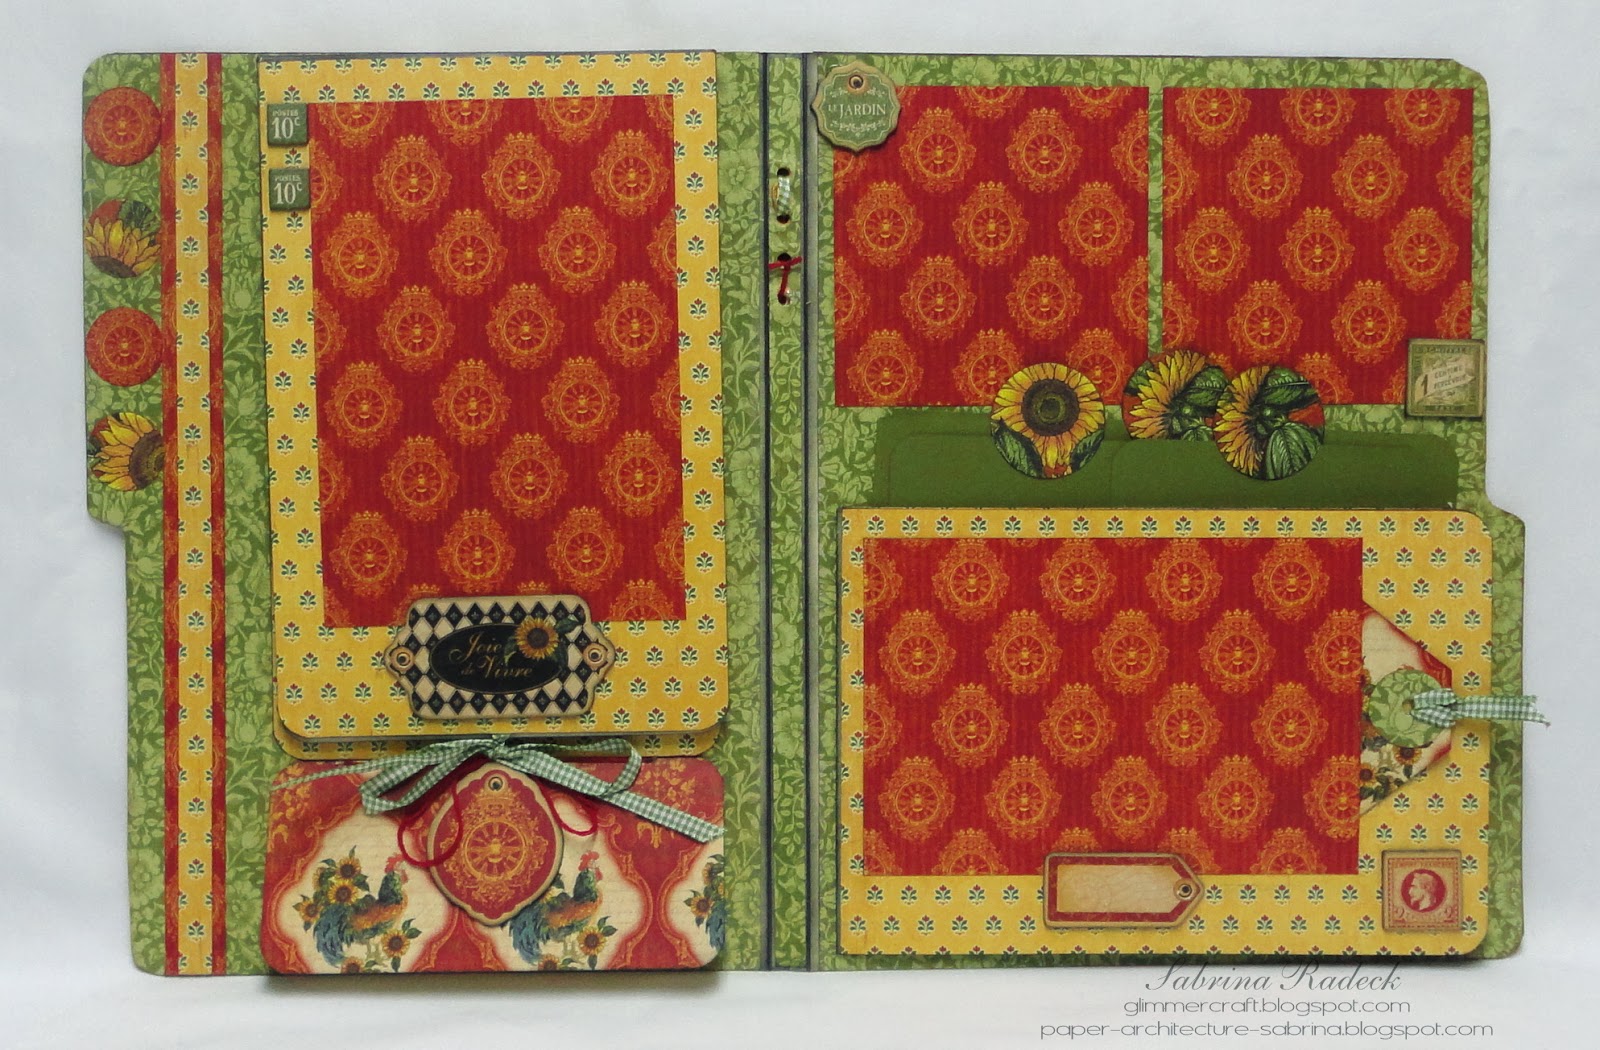
This folder holds 25 to 30 photos! And all in a file folder! Here are some more details...


This tag pulls out...


And this opens up to reveal...


two more photo mats. And tucked in behind are...

one...


two...


and three photo and journaling tags! What's next?  Well...


let's untie this and see what we find.


Cascading photo mats! See I told you it can hold a lot of photos.... Here's a side view.


Ready for more details? View the walk-through video next.


Be sure to leave a comment if you are interested in more File Folder Scrapping designs and if you'd be interested in the box instructions too.

Hope on over to Paper Architecture to purchase your set of measurements, instructions and tutorial videos on how to make this project.

Thank yo so much for stopping by today. Happy papercrafting!


French Country Birthday Card

A quick post for you today. It feels good to have a moment to post something!

One of the ladies I Visit Teach on a monthly basis has her birthday on the 14th. A Valentine baby! I thought that I would avoid anything Valentine for her. Since I have a ton of scraps from teaching classes, I dug out some French Country paper scraps and created this quick card for her.


Viewing the card from other angles-


I used My Favorite Things "Upsy Daisy" Die-Namics for the daisies and leaves, and Hot Chocolate Liquid Pearls for their centers.

 Thank you for stopping by for a quick look.

FYI I'll be busy this week putting together a set of instructions for "Paper Architecture with Sabrina". So I should have a new project for those interested. I've been real busy kitting for classes I'll be teaching in Edmonton in a couple of weeks. So this week I'm excited to finally have some time to take care of my project makers.


    I'm Published! Through the Craftroom Door

    Hello everyone!

    Hope you are having a good weekend.

    Do you remember this?


    Later, I made a tutorial due to the high number of requests, here, on how to make the base of this double sided step card. Well, recently I was asked by Colleen, the owner and publisher of Through the Craftroom Door online magazine, if they could publish my tutorial! How exciting is that!


    Through the Craftroom Door is  wonderful community with galleries, a forum, groups to join, challenges, and more! You can also subscribe to their online magazine for tutorials, tips, techniques, craftroom ideas, and free digital stamps, etc! Why not check them out and join!


    Happy papercrafting!